Contents
How to Mic a Guitar Amp for Recording
TL;DR: To mic a guitar amp, place a Shure SM57 at the speaker cone edge, angled 10–30° off-axis, with the capsule 1–3 inches from the grille. This single-mic setup works for 90% of recordings. Move the mic toward center for more attack and brightness; toward the edge for warmth and less bite.
The SM57: Still the Right Starting Point
Direct answer: A Shure SM57 placed at the speaker cone — not the center, not the edge — captures the broadest, most usable guitar tone. Start here before adding any second mic.
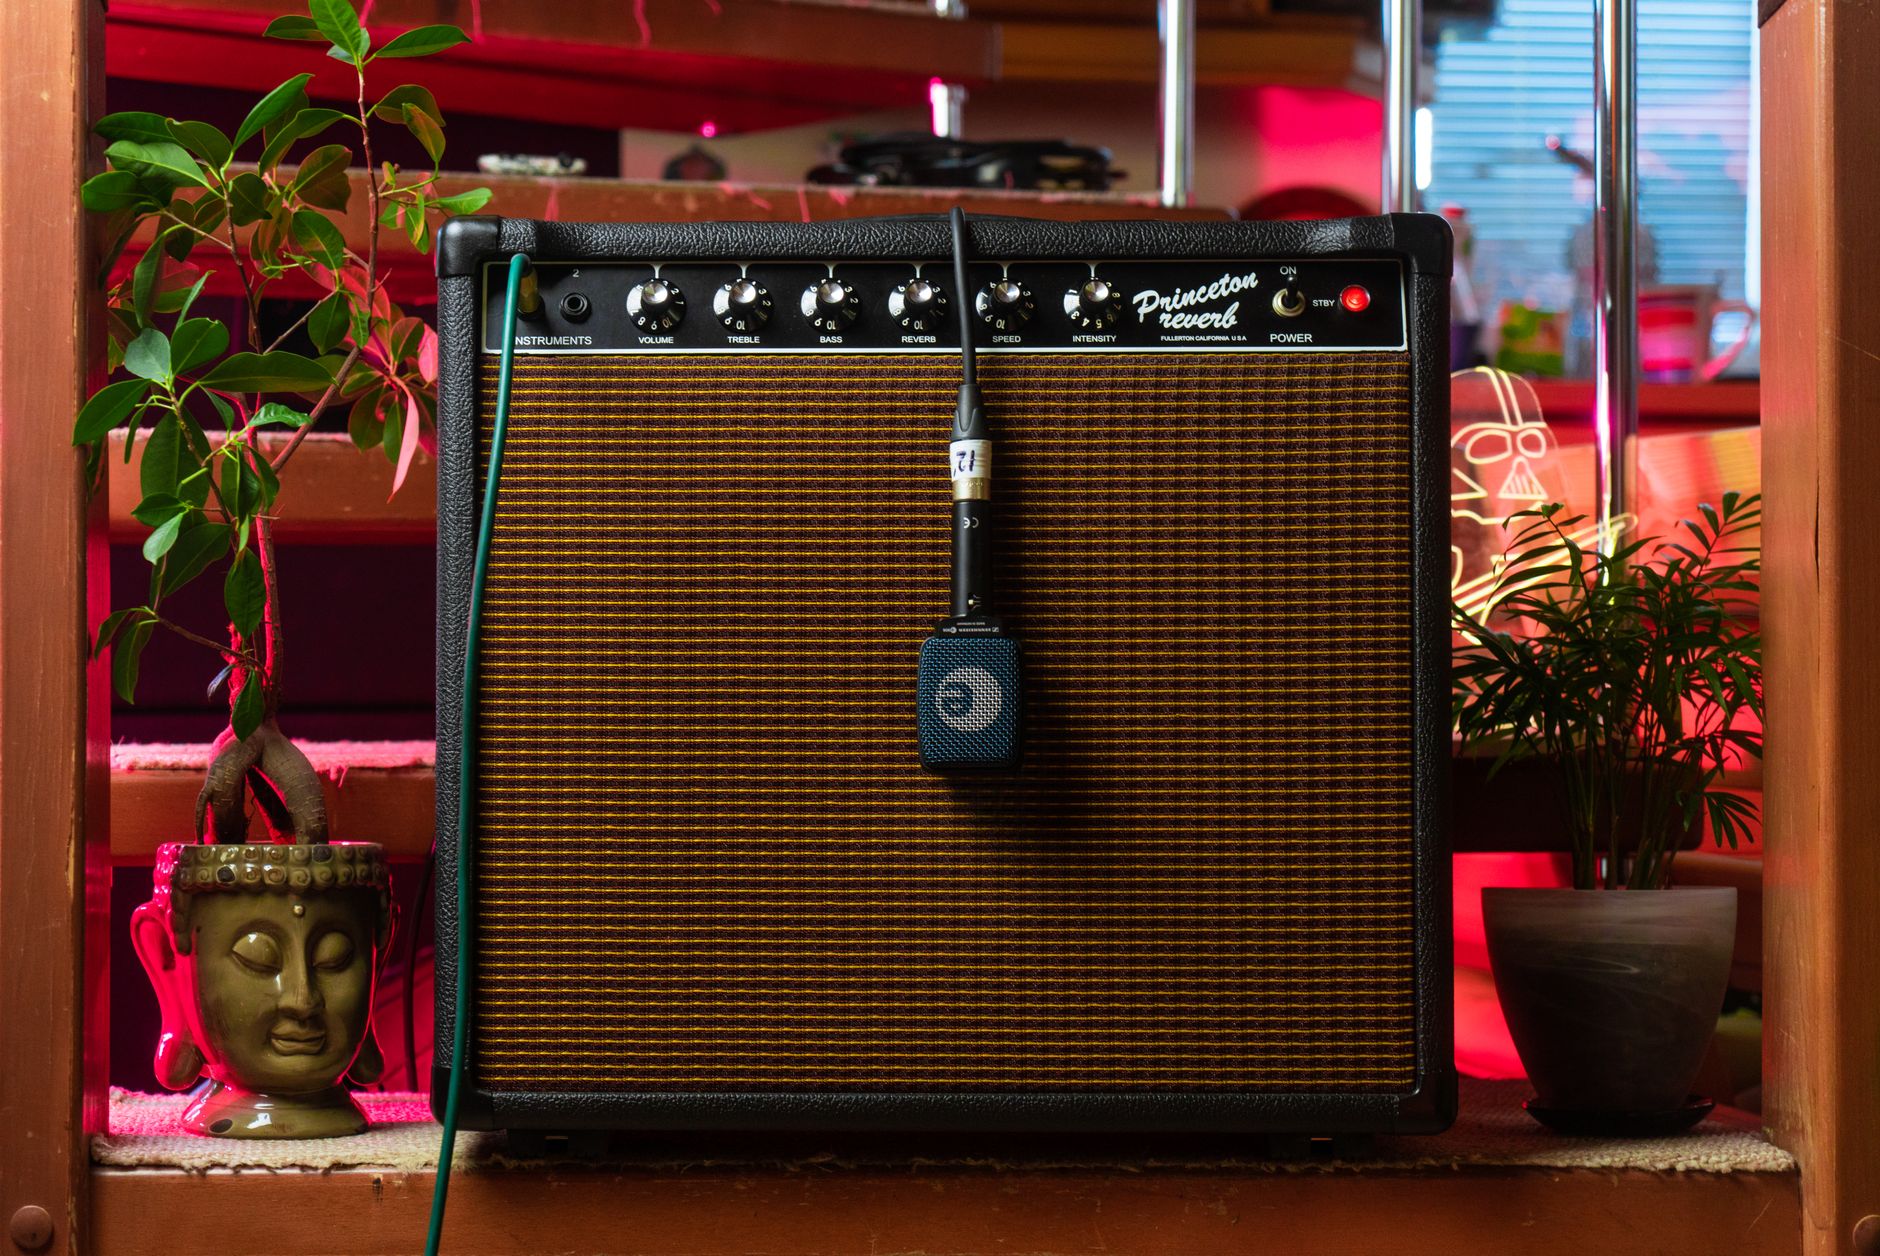 Photo: Alena Sharkova via Pexels
The SM57 dominates amp mic technique for good reason: its presence peak (around 5–10 kHz) adds natural definition to electric guitar without harshness, and its cardioid pattern rejects room reflections at close range. Published frequency response data confirms it handles high SPLs from cranked amps without distorting.
Every major recording guide, from Pensado’s Place to Sound On Sound’s studio technique archives, converges on the same starting position: capsule 1–3 inches from the grille cloth, aimed at the point where the speaker cone meets the dust cap — roughly two-thirds of the way from the center.
Understanding Speaker Zones Before You Place the Mic
Direct answer: A guitar speaker has three distinct zones. The dust cap center produces the brightest, most aggressive tone. The cone edge is darker and boomier. The sweet spot — cone/cap junction — is balanced. Start there and move deliberately.
 Photo: Caique Araujo via Pexels
Center (Dust Cap)
Maximum high-frequency content, maximum attack. Used for lead tones that need to cut, but can sound harsh and thin. User reviews of popular recording setups consistently describe center-only positioning as fatiguing over long sessions.
Cone Edge
Rolling off the highs, adding warmth and low-mid bloom. Good for rhythm parts that need to sit under a vocal without competing. Risk: proximity to the cabinet edge can introduce boxy resonances.
Junction Zone (Default Position)
The blend point — enough clarity for definition, enough body for weight. This is where to start every session. Small movements (half an inch) produce audible changes, so mark your initial position with tape on the floor.
Angle Matters as Much as Position
On-axis (mic perpendicular to grille) gives the fullest, most direct sound. Moving the capsule to 15–30° off-axis softens the high-frequency peak and reduces harshness — useful on bright amps or bright guitars. Beyond 45°, the tone becomes progressively thinner and phasier.
SM57 Placement for Guitar Amp: The 5 Most Common Positions
Direct Answer: Start at the cone/cap junction, 1–3 inches from the grille, 15–30° off-axis. That single position covers 90% of sessions. The four alternatives below are deliberate tone adjustments, not experiments.
| Position | Mic Location | Sound Character | When to Use |
|---|---|---|---|
| 1. Cone/cap junction, off-axis 15–30° | Where cone meets dust cap, angled slightly | Balanced: definition + body, no harshness | Default starting point for all genres |
| 2. On-axis center (dust cap) | Directly facing the dust cap center | Bright, aggressive, maximum attack | Lead tones that need to cut through a mix |
| 3. Cone edge | Capsule near the outer rim of the cone | Warm, dark, less mid-frequency presence | Rhythm guitar that needs to sit under vocals |
| 4. 6 inches back, off-axis | 4–6 inches from grille, 20–30° angle | Roomy, spread, some natural ambience | When you want size without a second room mic |
| 5. Combined: close SM57 + room condenser | SM57 at junction + condenser 3–6 feet back | Full frequency response + depth | Mixing in parallel; blend to taste in DAW |
Moving the mic: Half an inch of movement at the speaker cone produces audible tonal change. Before each session, mark your start position on the floor with gaffer tape so you can return to it between takes.
Signal Chain and Gain Staging
Recording Chain
Guitar → Amp → Speaker Cabinet
                    ↓
               Shure SM57 (1–3" from grille)
                    ↓
            XLR cable → Audio Interface mic preamp
                    ↓
                  DAW (record at −18 dBFS average, peaks under −6 dBFS)
Gain staging notes:
- Set preamp gain so the loudest peaks hit −6 dBFS maximum — guitar amps produce transient spikes at pick attack
- Do not use the interface’s pad unless the preamp clips before reaching usable gain; most interfaces handle SM57 levels cleanly
- Record at 24-bit depth; the extra headroom makes gain staging errors recoverable
- Disable any onboard DSP, limiting, or compression on the interface during tracking
Step-by-Step Mic Placement Workflow
- Set the amp volume to the performance level before placing the mic — tone changes significantly between bedroom and loud volumes.
- Place the SM57 capsule at the cone/cap junction, 1–2 inches from the grille, perpendicular to the speaker.
- Set record levels — play the hardest you’ll play during the take; adjust preamp gain until peaks sit around −12 to −6 dBFS.
- Record a 30-second reference clip and listen back through headphones (not monitors, to isolate mic placement from room acoustics).
- Adjust position based on what you hear: too bright → move toward the cone edge or increase off-axis angle; too dark → move toward the dust cap or reduce angle.
- Mark the mic stand position with gaffer tape once you’re satisfied — vibrations can shift a stand during a take.
- Add a room mic (optional) 3–8 feet back, pointing at the amp. Blend in the fader at −10 to −15 dB relative to the close mic for natural ambience.
 Photo: cottonbro studio via Pexels
Two-Mic Techniques
Direct answer: The most common two-mic setup pairs a close SM57 at the cone with a large-diaphragm condenser 3–8 feet back as a room mic. Always check phase alignment before committing — polarity flip on one mic may improve punch.
 Photo: RDNE Stock project via Pexels
SM57 + Ribbon Mic (Royer R-121)
Expert consensus in recording forums and producer interviews positions this as the professional standard. The ribbon’s natural high-frequency rolloff complements the SM57’s presence peak, producing a combined tone that doesn’t need EQ to sit in a mix. Place both mics at the same capsule position (or within an inch), then check phase: flip polarity on one channel and pick whichever position sounds fuller.
SM57 + Room Condenser
A large-diaphragm condenser like the AKG C414 or even a budget option placed 6–10 feet back captures room acoustics. This works best in treated rooms or intentionally live-sounding spaces. In a dead bedroom studio, the room mic often adds more noise than ambience — skip it and use a reverb plugin instead.
Phase Alignment Check
- Pan both mics to center
- Sum to mono
- Flip polarity on one track
- Listen: if the guitar gets thinner, flip back; if it gets fuller, keep the flip
Troubleshooting Matrix
| Symptom | Likely Cause | Fix |
|---|---|---|
| Tone sounds thin and harsh | Mic too close to dust cap center | Move toward cone/cap junction or cone edge |
| Tone sounds boomy and undefined | Mic too close to cone edge; or too much proximity effect | Move toward junction zone; increase distance slightly |
| Hum or buzz in the signal | Ground loop between amp and interface | Use a ground lift adapter; check all cable connections |
| No signal | Phantom power on? (not needed for SM57) | Turn off phantom power; check XLR seating |
| Fizzy, scratchy distortion in recording | Preamp clipping | Reduce interface gain; re-check gain staging |
| Left/right phase cancellation | Two mics out of phase | Check alignment; flip polarity on one channel |
| Recording sounds different than the room | Mic too far off-axis | Reduce angle; move capsule closer to grille |
| Comb filtering artifacts | Two mics at mismatched distances | Apply delay compensation in DAW or reposition |
Common Amp Types and Mic Placement Adjustments
Different amp designs reward different approaches based on documented speaker and cabinet characteristics:
Open-back combos (Fender, Vox): The speaker radiates sound from both sides of the baffle. Mic the front normally; a second mic on the open back captures a darker, more diffuse tone — blend carefully for phase issues.
Closed-back 4×12 cabinets (Marshall, Mesa): Each of the four speakers sounds slightly different. Published testing from engineers at major studios recommends auditioning each speaker individually before committing — the top speakers in a vertical cab often sound brighter than the bottom ones due to standing waves.
Small practice amps cranked: Works well for overdriven tones. The smaller speaker (8“ or 10“) typically sounds thinner than a 12“, so positioning toward the junction zone rather than the edge preserves body.
→ See Also
- How to Record Guitar at Home: The Complete Guide (2026)
- How to Record Electric Guitar at Home
- How to Record Guitar Without an Amp
FAQ
What mic do professional engineers use to mic a guitar amp? The Shure SM57 appears on virtually every professional amp recording, from Nashville session rooms to major-label tracking facilities. It’s not the only option — ribbon mics like the Royer R-121 are widely used — but the SM57 is the standard starting point because its frequency response suits electric guitar without modification.
How far should a mic be from a guitar amp? 1–3 inches from the grille is the standard close-mic distance. Closer emphasizes low-end through proximity effect and captures a drier, more direct tone. Moving back to 6–12 inches adds room sound and reduces proximity effect, but also picks up more of the recording space — useful if the room sounds good, problematic if it doesn’t.
Do I need a room mic when recording guitar amp? No — a single close mic is sufficient for most recordings, and a treated or untreated bedroom studio usually produces more noise than useful ambience from a room mic. A reverb plugin gives you more control with no phase issues. Add a room mic only if the space genuinely sounds good and you want that character in the recording.
Why does my recorded guitar tone sound different from what I hear in the room? Your ears integrate the whole room, including reflections; the mic only captures what’s directly in front of it. A mic at the grille hears one speaker at close range, while you hear the full cabinet plus room bounce. This is normal — use reference tracks and trust the playback, not the comparison to the room sound.
Should I use mic input or instrument input on my interface for recording guitar amp? Always use the XLR mic input with the SM57 — it’s a dynamic microphone that requires a preamp, which the mic input provides. The instrument (hi-Z) input is for direct-input recording of guitars bypassing an amp entirely. Using the wrong input produces either no signal or severe impedance mismatch.
Can I mic a guitar amp with a condenser microphone? Yes, though condensers require phantom power (48V) and are more sensitive to high SPLs — a cranked amp can overload a condenser capsule. If using a condenser close-mic, check its maximum SPL rating (look for ≥130 dB SPL in manufacturer specs) and use the mic’s built-in pad if available. Condensers often work better as room mics than close mics for high-gain amp tones.
Editorial methodology: Assessments are based on manufacturer specifications, published user reviews, and editorial research. Physical hands-on testing is noted explicitly where it occurred. Rankings reflect our editorial judgment and are not influenced by affiliate commission rates. Full editorial policy · Affiliate disclosure